What is 3D Printing?

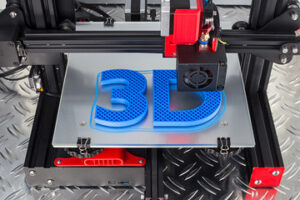
3D printing is a process in which a digital model is turned into a solid three-dimensional physical object. Unlike traditional manufacturing techniques that cut away materials, 3D printing creates objects by adding layers of material.

3D Printing

From fun figurines to product prototypes, to tactile maps and historical artifacts to sustainable habitats for deep space exploration, the possibilities are endless. Contact By3Design for professional help.

3D printing is a process for making physical objects from various materials based on a three-dimensional digital design. Unlike traditional manufacturing methods such as cutting away material from stock items, casting and forming parts in metal molds, 3D printers build up solid objects by adding layers of material on top of each other to create complex geometries and structures.

The resulting physical objects can be used to support a wide range of projects and activities, from fun figurines and jewelry to prototypes for engineers and architects. Students, teachers and researchers can also utilize the technology to analyze historic artifacts or investigate anatomical and molecular structures.

While many people think of 3D printing as a relatively new technology, the first commercially available 3D printers were introduced in the 1980s. Today, 3D printing is widely used in a variety of industrial and consumer applications.

To produce a 3D print, the user begins with a digital model, typically created using computer-aided design (CAD) software programs. The model is then converted into a series of coordinates that describe the geometry of the object and then saved as a file known as an STL (Standard Triangle Language) file. This is a universal file type that can be read by all 3D printers.

Once the STL file is loaded into a 3D printer, the printer “prints” a layer of material on top of each other until the object is complete. The most popular and affordable 3D printing technology is called fused deposition modeling or Fused Filament Fabrication, which uses a heated nozzle to extrude thermoplastic filaments like PLA (Polylactic Acid), ABS (Acrylonitrile Butadiene Styrene) or PETG (Polyethylene Terephthalate Glycol) onto a platform to create the desired object.

More advanced technologies use liquid resins, powdered materials or metals to produce objects. Fused laser sintering (SLS) and Direct Metal Laser Sintering (DMLS) use UV lasers to cure a liquid or powdered material into a solid layer by layer, producing fine details and intricate components.

Materials

The materials that 3D printers use to create objects are incredibly important because they impact the final printed object’s strength, durability, flexibility and heat resistance. The right material also influences the aesthetics of the print.

The most popular 3D printing material is plastic filament, which comes in a variety of colors and has excellent layer adhesion to make it a very durable material. PLA is also the most environmentally friendly option and can be used to create everything from medical models to artistic pieces. It also works well with paint and super glue for customization after the print is finished.

Resins are liquid polymers that harden under UV light in stereolithography (SLA) and digital light processing (DLP) machines, and are a great choice for applications that require high precision and a smooth surface finish. Standard resins offer a balance of strength and cost effectiveness, while engineering resins have specific mechanical properties that make them ideal for functional prototypes and end-use parts in product development and engineering. Tough resin is engineered to mimic the stiffness and strength of ABS plastic while remaining flexible, and high-temperature resin withstands extreme temperatures for use in heat-resistant fixtures.

Other commonly used plastics in 3D printing include polypropylene (PP) and elastomeric thermoplastics such as polyurethane. PP is a partially crystalline plastic that offers a good combination of strength and flexibility with low moisture absorption, while elastomeric thermoplastics like polyurethane have good resilience and can flex up to 580% of its elongation before breaking.

In addition to conventional plastics, some printers are also capable of creating metal parts using a process called direct metal laser sintering (DMLS). In this technology, the machine’s bed is filled with powdered metals like aluminum and stainless steel, which are heated with laser beams for a quick, inexpensive production of high-quality metal parts.

The Library is currently offering PLA to YorCreate patrons, but we welcome the use of your own PLA for projects you have designed at home or for which you have a source file. The Library cannot help you design a model, but we can assist you with finding resources online or in-person to get you started.

Printing Process

The 3D printing process is often referred to as additive manufacturing (as opposed to conventional machining, casting and forming which involve subtracting material). It works by building up an object layer by layer from a digital model, much like traditional printers print words or images onto paper. Each printed layer adds to the total height of the finished product.

3D printing can be used to produce a wide variety of parts and products. The processes and materials vary by printer, but they all share one thing in common: they start with a digital 3D design file. This file is then ‘sliced’ into thin layers, each of which the printer prints onto a bed of starting material. The thickness of each slice determines how long it takes to complete the print and the overall part dimensions.

Each sliced layer is then solidified with a binding agent, typically a liquid. Some processes, such as Fused Deposition Modelling (FDM) and Directed Energy Deposition (3D PEEL), use heat to melt the starting material into a solid. Others, such as SLS, DMLS and EBM, use a laser beam to consolidate powdered material into the desired structure.

Other 3D printing technologies, such as photopolymer jetting and binder jetting, use a moving print head with nozzles connected to containers of liquid photopolymer resins. The nozzles spread the resin in areas that correspond to the geometry of a given layer onto a build platform, which is then cured with UV light. The printed part is then rinsed off and trimmed of support structures if required. For some materials, the final printed part may require post-processing such as further sintering or heat treatment.

All of these processes can produce highly detailed, full-colour, and multi-material printed parts, but they can take time. Compared to conventional manufacturing, this is why Geomiq 3D printing is so attractive – it can make complex, high-value, single parts and assemblies significantly faster.

Applications

3D printing is a process that creates real, physical objects from a digital model using a variety of plastics and resins. It is often called additive manufacturing because it builds an object layer by layer rather than removing material from a stock item like traditional machining, casting and forging processes do. 3D printing allows manufacturers to quickly make prototypes and test out different sizes, shapes and assembly options that may otherwise be difficult or impossible. This shortens the development time, helps reduce costs and allows for iterative changes before production starts, resulting in better, more cost-effective products.

While the 3D printing process varies by technology, most use a computer program that converts a three-dimensional digital model into a series of two-dimensional slices. Each slice represents a specific part of the final product. The software then tells the printer to solidify a specified amount of starting material on each layer of the printed object. Once all of the slices are printed, they can be assembled to form the final product.

In addition to standard plastics and resins, 3D printing can be used with a wide range of other materials including paper, ceramics and bio tissues. 3D printing also has the potential to be used in healthcare, enabling the creation of patient-matched medical devices, including implants and prosthetics.

Medical applications of 3D printing are growing rapidly. For example, surgeons can prepare and practice surgical plans with 3D models of damaged organs or anatomical specimens before the actual operation. This can allow them to study the defect and try out various approaches, resulting in shorter operations, reduced risk of complications and improved outcomes for patients.

Other medical applications include the creation of prosthetics and dental appliances that can be made in just a few hours. Patients can also be fitted with custom-made devices based on individual anatomic features that are captured by medical imaging.

3D printing can even be used to create replacement parts for existing medical equipment such as ventilators and heart valves. The ability to print replacement parts at lower cost, in just a few hours, could significantly improve the availability of these vital pieces of medical equipment and help cut down on waiting lists for patients who need them.

Becoming a Plumber

Plumbers Bradenton do much more than unclog toilets or repair sinks. They design piping systems that disperse water, remove waste, and connect heating and cooling systems.

Plumber

They also work closely with architects and construction teams to ensure that plumbing systems are integrated seamlessly into building projects and meet all required standards and regulations. And they are always on call to respond to emergencies like burst pipes and clogged drains.

Choosing to become a plumber is an excellent career choice for individuals who enjoy working with their hands and solving problems. Plumbers work in a wide range of settings, including homes, businesses, and industrial buildings. They install, repair, and maintain plumbing systems that include water supply lines, drains, and waste removal systems. They also inspect and test systems to ensure that they are functioning properly. Plumbers must be comfortable working with tools, in tight spaces, and around hazardous materials. They must be able to follow strict safety protocols when handling chemicals and operating power equipment.

Plumbers are often hired by construction companies to manage and supervise the installation of plumbing systems for new building projects. They must be able to read blueprints and understand the specifications for each project. They may also need to perform inspections and testing of existing plumbing systems. These tests may include checking for leaks, signs of corrosion, and proper venting of gas lines. Plumbers may also be responsible for submitting reports and obtaining permits.

Residential plumbers focus on the plumbing needs of homes and apartments. They install and repair fixtures like bathtubs, showers, sinks, and toilets. They also inspect the water and sewage systems for clogs, breaks, and other problems. These plumbers also handle routine maintenance, such as cleaning drains and replacing worn-out parts.

Commercial plumbers work in a wide variety of commercial and industrial settings, including offices, retail stores, restaurants, hospitals, and power plants. They install and repair complex plumbing systems that serve multiple occupants, such as water supply lines, fire sprinkler systems, and large water heaters. In these roles, plumbers must be able to coordinate with facility managers and other contractors.

Service and repair plumbers are the front-line staff for plumbing services. They respond to calls from customers and perform repairs on site. They must be able to diagnose and fix problems quickly and efficiently. In addition to their technical skills, service and repair plumbers must be personable and able to communicate effectively with customers. They are also responsible for ensuring that their own work meets industry standards and customer expectations.

Education and training requirements

Plumbers install, repair, and maintain water, gas, and drainage systems. They work in homes, commercial buildings, and factories. They also install and repair plumbing fixtures such as bathtubs, toilets, and sinks. They may also work on appliances such as dishwashers and water heaters. They can even be found repairing septic systemsthe large underground tanks that collect waste from houses not connected to sewer systems.

To become a plumber, you need to complete a training program and earn a license. There are several options available for plumber training, including vocational programs and apprenticeships. Many vocational programs are offered at local colleges and trade schools. These programs typically combine classroom education with practical hands-on experience. They also teach skills like pipe system design, safety, and tool use. Some programs even offer welding courses, which are required by some pipefitter and steamfitter apprenticeship training programs.

Apprenticeships last four to five years and combine classroom instruction with on-the-job training. Most states require that plumbers be licensed. The steps to becoming a licensed plumber vary by state, but the process is usually similar. Applicants must first obtain a high school diploma or GED certificate. They then need to complete a vocational program at a trade school or community college. Many plumbers choose to join a union, which provides additional training opportunities and job security.

After completing the program, a candidate must pass an exam to become a licensed journeyman plumber. The exam is typically based on the National Board of Plumbing Examinations. The National Board of Plumbing Examinations is an independent organization that sets standards and exams for the plumbing industry. Plumbers who want to become master plumbers must pass a more comprehensive exam, which covers advanced plumbing practices and business management.

Some states do not have licensing requirements for plumbers, but most have a progression of apprenticeship, journeyman, and master levels that require specific qualifications. For example, New York requires all plumbers to hold a license and submit a surety bond before they can work. In addition, the state requires that plumbers renew their license every year.

Work environment

Plumbers work in a variety of settings, from residential to commercial and industrial. They perform many different tasks, including installing and repairing fixtures, addressing leaks, and ensuring that all systems are functioning properly. They also use a wide range of tools and equipment to perform their job duties. Some plumbers specialize in specific areas, such as repairing water heaters or toilets. Others may choose to focus on the installation of septic systems and other sewage systems. Plumbers often travel to different sites and work long hours, including nights and weekends.

In addition to the physical demands of this career, plumbers must be able to work under pressure and adhere to strict safety standards. This can be challenging, especially in emergency situations, when plumbers must work quickly to address urgent problems. However, these challenges can be rewarding when they are overcome.

Plumbing is a highly-skilled profession that requires extensive training and hands-on experience. Aspiring plumbers should consider taking a vocational course, such as a Certificate III in Plumbing, to gain the skills and knowledge necessary for success. This program is designed to provide a fast track into the industry and offers hands-on learning opportunities.

Plumbers must be able to work in tight spaces and awkward positions, and they often need to lift heavy objects. They also need to be comfortable working in chilly or hot weather conditions. Many plumbers are self-employed, so they must manage their own schedules and be on-call for emergencies.

Plumbers typically work with other professionals, such as builders and architects, to ensure that all plumbing systems are installed correctly in new construction or renovation projects. They must be knowledgeable about local building codes and regulations to guarantee the safety and functionality of plumbing systems. Plumbers must also be able to communicate effectively with customers and other tradespeople.

Plumbing is a demanding but rewarding career, and it’s a great choice for those who are interested in a challenging and varied work environment. There are many career paths in the plumbing industry, from apprenticeships to self-employment. Those who are passionate about the industry can also opt for further education or professional development programs to keep up with advances in technology and equipment.

Salary

A plumber’s salary varies by location, experience, and work type. Beginners start with an average of $40,000; seasoned plumbers can earn up to $100,000. Some of the highest-paid plumbers are union members and those who specialize in green plumbing or HVAC. The Bureau of Labor Statistics provides wage estimates for different regions and skill levels.

To begin a career as a plumber, students can enroll in a plumbing trade school or an apprenticeship program. These programs provide a combination of classroom instruction and hands-on training. They teach students about plumbing systems, soldering techniques, water backflow prevention, and blueprint reading. In addition, they help students develop job skills and become licensed. Typically, these programs last for 4-5 years and are a great way to get started in the field.

Plumbers are construction specialists who repair and install several types of pipes that carry gas and water to a building or home. They also install fixtures that take waste away from industries and individual homes. Some of these fixtures include toilets, sinks, bathtubs, and showers. Plumbers are a skilled trade that can offer stable demand and lucrative pay.

A career in plumbing is a good choice for those who enjoy the challenge of solving problems. They must be able to think critically and solve complex issues. They must also be able to handle pressure and tight spaces. Some of the best plumbers are able to perform work under tight deadlines.

The national average salary for plumbers is $60,090, but this number can vary significantly by region. In cities like San Francisco, they can earn $82,000 or more per year. However, in the rural Midwest, salaries are lower. This may be because of the lower cost of living and low demand for skilled trades workers.

In 2022, the occupation had a wage GINI coefficient of 0.33, which is less than the national average of 0.478. This means that wages were more evenly distributed across the country for plumbers than in other professions.

There are many ways to become a plumber, including earning a high school diploma or taking an associate’s degree at a community college. Apprenticeships are another option, and can lead to higher wages than a traditional four-year degree. Plumbers can also improve their earnings by obtaining additional certifications.

Kitchen Remodeling Step by Step

A remodel requires a significant amount of time and energy. Plan on a timeline that will take weeks or even months. Consider creating a temporary kitchen away from the construction site so that you can at least cook, eat and store food.

Kitchen Remodeling

Unless you’re handling the entire project yourself, locate, vet and hire designers and contractors. Keep lead times in mind for items like tile, countertops and custom cabinetry. Contact Kitchen Remodeling Lexington KY for professional help.

Whether you’re replacing your kitchen cabinets, adding an island, or tearing down walls to make space for a new layout, demolition is a necessary part of any renovation. It’s a messy process that produces a lot of dust and debris, but it sets the stage for your project’s success.

Demolition experts bring a level of expertise, efficiency and safety to the job that ensures it’s handled properly. They know what to look for and how to approach the work, reducing the risk of accidents or missteps that could derail your remodeling project. They can also access dumpsters and waste disposal services, making the entire process seamless for you.

When preparing for demolition, it’s important to shut off the water supply before beginning work. It’s also a good idea to disconnect any existing appliances, such as refrigerators and stoves, and move them away from the workspace. This prevents accidental shocks during the removal process and protects them from damage or theft.

Proper demolition can also reveal hidden problems that may need attention, such as water damage or mold. These issues can be addressed during the remodel, preventing costly and time-consuming repairs later on. It’s also an opportunity to make improvements to a room’s functionality by strategically removing or moving walls, adding electrical outlets or plumbing, and replacing old fixtures. This helps create a functional space that perfectly fits your lifestyle and needs.

Rough-In Work

Once all existing items have been removed, the rough-in work can begin. This includes any structural work and plumbing. The goal of this phase is to frame in new walls, add joists, and install the necessary mechanical, electrical, and plumbing lines. This is done before drywall is installed and is best handled by a professional team to avoid damage to existing pipes and plumbing fixtures.

When it comes to electrical rough-ins, this process includes running wiring through the framing, installing junction boxes for outlets and switches, and setting up circuit breakers. It is also important to install smoke and carbon monoxide detectors as well.

The plumbing rough-in process can be a bit more complicated. This involves laying in new water and gas pipes as well as ensuring they are correctly sized and properly routed for future expansions. Additionally, it is important to leave a little “wiggle room” in the plumbing rough-in dimensions so that future fixture upgrades can be easily implemented.

Once the plumbing and electrical rough-in work is complete, an inspector will visit to ensure that it meets all local code requirements and safety standards. Then, the finishing construction can begin. This is when the actual kitchen cabinetry, flooring, and appliances are installed. It is important to schedule your remodel with these installation dates in mind so that you have enough time for your project. This step can take anywhere from one week to a month depending on the specific product you are installing in your kitchen.

Cabinet Installation

After the rough-in work is complete, the next step in kitchen remodeling is cabinet installation. The process involves attaching cabinets to the wall, ensuring that they are level and plumb, and connecting them to each other and to the countertops if necessary. It also includes sanding and finishing the surfaces to ensure that they are smooth, clean and ready for use.

Cabinet installation is a time-consuming task, and the duration of the process can vary depending on the scope of the project. For example, if you are refacing your cabinets instead of replacing them completely, the project may take longer as the old doors and drawer fronts need to be removed before installing new ones.

Additionally, if the walls are uneven or need to be patched, this will add to the overall time of the project. It’s important to hire a professional contractor for this type of job to guarantee the results you’re looking for.

It’s possible to complete the cabinet installation process on your own, but involving professionals can help you avoid costly mistakes and save time. A skilled contractor can handle all aspects of the remodel, including addressing unexpected challenges that could delay the completion of the project. They can also assist you in choosing the right cabinet door style and color that complements your home and enhances its value. They can also provide insights into current design trends to help you make the most of your remodeling budget.

Appliance Installation

Once the rough-in is complete, contractors can move onto the final stage of kitchen remodeling: appliance installation. It’s important to choose appliances that coordinate with the color and style of cabinetry, countertops, and flooring for a polished look. Also, consider energy efficiency. Adding new appliances that meet EPA energy standards can cut utility bills and add value to the home by increasing the property’s appeal to eco-conscious buyers.

Many people remodel their kitchens for functional reasons, such as a desire to update outdated appliances or a changing lifestyle that necessitates a larger dining area or more kid-friendly features. In addition, some homeowners make a conscious decision to invest in a remodel to improve their home’s energy efficiency by installing green features like new insulation or LED lighting.

Before you start the remodel process, it’s a good idea to consult with several contractors to get estimates and determine which one best fits your needs and communicates well with you. Be sure to discuss your budget and kitchen checklist with contractors, and don’t accept estimates that are more than double your budget. Also, be wary of contractors who take a long time to return your call or email; this could be an indication that they are overbooked and may not be available to work on your project. A reputable contractor should be both competent and available to start the remodel as soon as possible.

Flooring Installation

When it comes to home improvement projects, kitchen remodeling is one of the most common and highest return projects available. Whether you’re trying to boost your home’s resale value or simply improve its functionality, these upgrades are a great way to make a significant impact without making major structural changes.

Once the walls have been finished, it’s time to add the flooring. If you’re installing a new floor, it’s important to choose materials that will complement the overall style of your Temecula home and your personal preferences. For example, a contemporary or modern kitchen might look better with sleek, shiny materials like ceramic tile, while a traditional or country home would look more appropriate with natural wood or stone flooring.

Linoleum and laminate are classic flooring options for remodelers on a budget, and they come in a huge variety of styles to fit any taste. For a more luxurious feel, hardwood floors have seen a resurgence in popularity. It’s essential to have your floors professionally sealed to ensure water resistance and general durability.

This is also a good opportunity to install any doors or windows that need replacing, as well as any caulking and weather stripping that might be needed for a more energy-efficient kitchen. Depending on the scope of your kitchen remodeling, this could be an extensive job. Ideally, this will be completed right before the countertops are installed to help avoid potential mistakes and delays.

Finishing Touches

Once you’ve completed all the major components of your kitchen remodel, it’s time to add the finishing touches that make the room feel completely your own. The options here are endless, from the practical to the decorative, so it’s important to take your time and choose a style that suits you.

Backsplashes can make a huge difference in your kitchen, adding texture and color to the space. There are a variety of materials to choose from, so finding one that works well with your countertops and cabinets is essential.

A beautiful tile backsplash is an easy way to add a pop of color, while stone or glass backsplashes offer a more subtle look. You can also add an accent wall to your kitchen, which is a great way to tie in the colors you’ve chosen for the backsplash with your overall design.

Cabinet hardware is another detail that can make a big impact. There are many different styles and materials to choose from, so finding the perfect knobs and handles for your new cabinets is easy. There are even smart home technology options for undercabinet lighting, so you can control the brightness with a smartphone app.

You can also upgrade your storage solutions in your kitchen, which will help you keep the space clean and organized. For example, adding a pull-out pantry or lazy Susans to your cabinets can give you more space to store items while still giving you easy access when needed.

Factors to Consider When Making a Window Replacement Investment

Window Replacement Rockville MD is a great way to boost your home’s curb appeal. However, there are many factors to consider before making this investment.

Window Replacement

Accurate measurements are vital for a perfect fit. Make sure the window opening is clear and free of obstructions.

The operating style of the new window will affect price. Energy efficiency is another important consideration. Double-pane windows with argon gas and low-E coatings will improve efficiency significantly.

Homeowners often make window replacement decisions based on the appearance of the product and its price tag, but they should also consider energy efficiency. Modern windows come with a host of features that reduce home heating and cooling bills. They are also made to lock tightly and resist air and moisture infiltration. This helps maintain a comfortable temperature in the home and protects walls, flooring and paint from mold, mildew and other problems.

Most newer homes feature double-glazed windows, which contain two insulated glass panes separated by an air space. The air space is filled with argon gas or has a low-E film that helps to reflect solar heat and prevent unwanted thermal transfer. In older homes, single-pane windows are more common. These types of windows waste energy by allowing heat to escape during the winter and allow unwanted sunlight to enter during the summer.

Some homeowners choose to upgrade to triple-glazed windows for even greater energy efficiency. Many manufacturers offer vinyl replacement windows that are manufactured to be virtually maintenance-free and come in a variety of colors, including white. Some even have a realistic-looking wood-grain finish that mimics stained oak.

Other factors that contribute to energy efficiency in replacement windows are the frames, glass and design of the product. Homeowners can opt for energy-efficient replacement windows that are NFRC-certified to ensure they meet industry performance standards. The NFRC seals are printed on the window frames and help consumers determine whether a product meets strict performance criteria.

Another consideration is the installation method. A full frame replacement can create more construction debris and may require a more extensive renovation of the existing window opening than a retrofit installation. The latter type of installation, which involves inserting the new window into the existing frame without removing it, is less disruptive and results in a cleaner process.

A good contractor can help homeowners decide which type of installation to choose. Choosing the right installation method is important because it will have a major impact on how long the windows last and how well they perform. Poor installations can drive up energy costs, cause early failure and damage other parts of the home.

Durability

Windows are a long-term investment, and homeowners want to be confident that their new windows will last. The longevity of a window depends on the quality of materials and construction. High-quality windows made from fiberglass, wood, or aluminum will offer a greater durability than cheap vinyl windows that are prone to cracking and warping. Energy efficiency is also a crucial factor that should not be overlooked. Windows that are certified by Energy Star will help reduce home heating and cooling costs and ensure a comfortable indoor environment.

While there are many different types of replacement windows available, double-hung windows are the most popular due to their versatility and ease of maintenance. These windows open and tilt inward, allowing you to clean the glass from inside your home without the need for ladders or stools. Sliding and crank-out windows are other durable options that can be customized to fit various openings.

When considering a window replacement project, it is important to choose a company with experience in the industry. A reputable company will be able to answer any questions and concerns you may have, and they will provide detailed information about the installation process. They should also be able to explain the differences between different window styles and materials, as well as their benefits and costs.

The cost of window replacement can vary widely depending on the type of window and installation method chosen. Full frame replacements, which require the removal of the existing window frame, tend to be more expensive than insert or retrofit replacements. However, the extra expense may be worth it for a higher level of durability and energy efficiency.

During the installation process, it is important to choose a time when the weather will be mild. Extreme heat or cold can cause materials like wood and vinyl to expand and contract, which can lead to a poor seal and leaks.

During the window replacement process, it is also important to take careful measurements and make sure the new window will fit properly. If the rough window opening is larger than the new window frame, a backer rod can be installed to fill the gap and prevent air leaks. It is also a good idea to purchase a bubble level, which will help to ensure the window is perfectly level and plumb.

Low Maintenance

Window replacement isn’t just about reducing your energy bill and making your home more comfortable; it’s also about improving the overall value of your home. Investing in high-quality windows with an ENERGY STAR rating and advanced insulation features promises to deliver long-term financial benefits, including lower maintenance expenses and increased property values.

High-performance, low maintenance windows are made from durable materials that are designed to withstand Canada’s harsh weather conditions without breaking a sweat. From vinyl to fiberglass and clad windows, low-maintenance window options offer homeowners the perfect blend of style, durability, and affordability. Low-maintenance materials like vinyl also require minimal cleaning and upkeep, making them the ideal choice for homeowners who want to spend less time on chores and more time enjoying their home’s comfort.

For added peace of mind, high-performance, low-maintenance windows come with a variety of security features to help protect your home from break-ins and intruders. In addition, many new windows are available with a multi-point locking mechanism to enhance your home’s safety and make it more appealing to prospective buyers.

In order to ensure that your new windows are installed properly, a professional installation team is critical. An experienced installer will carefully remove the existing window sash, taking care not to damage the surrounding structure or wall. They will then inspect the rough opening for any signs of moisture, rot, or other problems that may need to be addressed. They will then apply caulk or flashing tape to prevent air leaks and secure the window frame in place.

Whether you’re installing a full-frame or retrofit installation, it’s important to plan for some construction debris and dust during the window replacement process. However, a reputable installer will take measures to minimize mess and clean up thoroughly after the work is done to minimize disruption to your daily routine.

In general, a well-planned window replacement project will be completed in just a few days, even when the installation requires the removal of an existing window. With a clear vision of the desired outcome and the support of a skilled, dedicated installer, you can rest assured that your new windows will be an asset to your home for years to come.

Style

Choosing window styles that match the style of your home can make your house feel more comfortable and increase its curb appeal. However, a number of different factors should be taken into account when making this choice, such as energy efficiency, durability and the amount of maintenance required.

One of the most important considerations is whether or not you’ll require a full replacement or an insert installation. A full replacement involves removing the existing frame and sashes and installing a new unit. This is usually a better option for homes with older, damaged or drafty windows. An insert installation is much less invasive, but it can be difficult to match the size, style and color of your existing windows.

The type of window you choose should also reflect your home’s architecture and ventilation needs. Double-hung windows, for example, are popular in traditional and transitional homes and work well in many different types of houses, from ramblers to farmhouses. Other popular styles include bay and bow, which protrude outward to add space and a beautiful view, sliders, which operate like single-hung windows but slide on horizontal tracks instead of vertical ones, and picture windows, which frame a view outside (like a painting) and don’t open.

Another factor to consider is the window’s material and frame structure. Vinyl offers a great look and good insulation, but it may not be as durable or low-maintenance as wood or fiberglass. Fiberglass frames, on the other hand, are more expensive but offer superior strength and are easier to clean and maintain than wood. Regardless of which window you select, it’s important to ensure that it’s backed by a manufacturer’s warranty for peace of mind.

Choosing the right window for your home doesn’t just impact its beauty and functionality – it can also help boost its resale value. Studies have shown that window replacement is among the few home improvement projects that can deliver a positive return on investment, so it’s important to consider your options carefully before making a final decision.

The Advantages of Cleaning Your Gutters Each Season

Cluttered gutters can damage your home and garden. Cleaning your gutters is an important maintenance task that should be done at least twice a year.

Gutter Cleaning

Be sure to use a ladder stabilizer, and wear gloves to protect your hands from the dirt, mold, and debris. Start at a downspout, and work your way across the gutters, scooping up gunk into a bucket or wheelbarrow as you go. Visit Website to learn more.

Clogged gutters can cause significant damage to your home, including water stains on exterior walls and ceilings and even a weakened foundation. The best way to avoid these costly repairs is to schedule regular gutter cleaning services.

The main function of a gutter system is to carry rainwater away from the house. This keeps the soil around the foundation drained properly, preventing erosion and protecting the structural integrity of the building. But when the gutters become clogged, it can lead to the water overflowing and soaking the soil. This can weaken the foundation and create cracks, which can be extremely dangerous for your home.

Stagnant water that accumulates in clogged gutters can also cause mold, mildew, and insect infestation. These problems can cause health hazards for your family and may require extensive clean-up and remediation.

Gutter overflow can also damage the fascia board, window trim, and doors by causing continuous wetness. The excess water can also rot the wood and cause unsightly stains. If you have landscaping, the clogged gutters can flood flowerbeds, erode soil, and sweep away mulch, ruining your hard-earned investment.

When the gutters are clogged, rainwater has nowhere to go except over the side of the house. This can saturate the soil, which can then erode the foundation and cause cracks. Water can also leak through the ceiling and into the attic, causing serious damage to insulation and possible mold growth inside the home.

If you’re concerned about the potential for water damage from a clogged gutter, be sure to document all affected areas as soon as possible. This includes taking photographs and videos of the staining, leaking or water-damaged areas. It’s important to document this as it can be helpful when filing a claim with your insurance company.

As you work to remove the clogs, it’s best to start at one end of the downspout and work your way down. Once you’ve removed as much debris as you can, use a hose with high pressure to flush the remaining sludge down the downspout and into the drain. Be sure to check that the water is coming out cleanly before moving on.

Clogged Gutters Can Cause Mold

Over time, clogged gutters can cause major damage to the exterior of your home. Whether it’s water-related damage to the fascia boards or siding, rotted soffit or drywall, unsightly and expensive roof leaks, or the destruction of your home’s foundation, you’ll be left with costly repairs and restoration bills if you don’t clean your gutters regularly.

Moreover, the stagnant water that can accumulate in clogged gutters provides ideal conditions for mold, mildew, and insects. These organisms can wreak havoc on your home’s structural integrity, and they can also be a health risk for you and your family.

If you see mold, mildew, or insect activity around the edges of your home, it’s a sure sign that your gutters are clogged and need to be cleaned. Stagnant water and debris provide ideal conditions for these organisms to thrive.

Wind and rain carry dirt onto the roof and into the gutters, where it becomes trapped. When this dirt isn’t cleared away, it can clog the gutters, which will cause the downspout to become clogged and overflow. If this continues, it can damage the exterior of your house and soften the soil near your foundation, which can lead to structural problems or even collapse your entire home.

If your gutters overflow, it can also flood your yard and pool against your foundation walls. This can damage or crack your foundation, and it may also cause the basement to flood. In the longer term, it can also create a favorable environment for mosquitoes and other unwanted pests.

Cleaning your gutters is not a job for the inexperienced. It’s best to hire a professional, who can use the proper tools and safety precautions to safely clean your gutters. Start at the spout and work your way down, using a gutter scoop or trowel to clear out leaves, twigs, and dirt from the gutters. Once you’ve removed as much of the debris as possible, use a hose to flush out the remaining debris in the downspout. Make sure the nozzle is on high pressure so you don’t damage your gutters or accidentally clog your downspout.

Clogged Gutters Can Cause Stains

The gutters on your home play a very important role in protecting it, but they can also cause damage if they are not cleaned. Gutters that are clogged can overflow, flood the foundation and even cause mold growth. These problems can be expensive to repair, which is why it is important to regularly clean your gutters to prevent clogs and overflowing.

One of the most obvious signs that your gutters are clogged is when water starts spilling over the sides. This is not only unsightly, but it can also damage your home’s siding and cause stains. Clogged gutters can also cause your roof to leak, which can lead to mold and mildew. The water that flows over your roof can also erode the soil and shingle material, which can weaken your structure.

Standing water in the gutters can also attract pests, which can damage your property. In addition, the moisture can trigger allergies and asthma in your family. Finally, the stagnant water can encourage fungus to grow, which can further damage your property.

Gutter cleaning is not the most fun task to do, but it is essential. If you’re not careful, your gutters can become clogged with leaves, twigs, and dirt. Clogged gutters can overflow, which can damage your home’s foundation, shingles, and siding. In addition, they can also lead to a host of other problems.

Keeping your gutters free from debris is essential for the health and appearance of your home. If you notice that your gutters are clogged, it’s time to call a professional. When you hire a professional, make sure they follow proper ladder safety procedures. They should also use a ladder that is sturdy and safe for their height. Also, they should wear work gloves and use a high-powered hose to clear the debris in the gutters. This will ensure that the debris is completely removed from your gutters and that it won’t re-clog your system. Once the clog is cleared, your gutters will be able to drain properly, which will protect your home from damage and prolong its lifespan.

Clogged Gutters Can Cause Damage to Your Roof

When your gutters become clogged with leaves, dirt, twigs and other debris it makes it impossible for water to safely flow through them. This prevents your guttering from doing its job which is to direct rainwater and snowfall away from the foundations of your home and into the landscaping around your property. Clogged gutters can cause a number of serious problems that can be very costly to fix if left unchecked.

One of the biggest issues associated with clogged gutters is the fact that it can lead to roof damage. When the shingles are exposed to water without an escape route they may begin to rot and crack. This can also lead to leaks which can cause major interior damage if left unchecked. In the long term, roof leaks can also cause damage to fascia boards and soffit materials, requiring expensive repairs or even a full replacement.

Another potential problem associated with clogged gutters is that it can create a breeding ground for pests. Mosquitoes, flies, wasps and other insects are attracted to the stagnant water and debris in clogged gutters and can become a real nuisance. If they have easy access to the inside of your home they will be able to breed and infest your living space, leading to numerous health issues for you and your family.

Finally, a clogged gutter can cause damage to your landscape. As water flows over the top of your clogged gutters it can spill out and flood flower beds and shrubbery, washing away mulch and drowning plants in excess water. This can also cause erosion which can lead to a damp basement or foundation problems in your home.

In winter, clogged gutters can also create ice dams which can be very damaging to homes. They form when snow begins to melt and then refreezes, blocking the gutter flow. This can damage the fascia boards, soffit and shingle materials, leading to leaks and general weakness in your roof structure. The best way to protect your investment and avoid these potential problems is to ensure that your gutters are free from blockages by having them cleaned regularly.

How to Make a Successful Bathroom Remodel

Bathroom Remodel is a great way to refresh the look of your home and increase its value at the same time. Prices range from a simple transformation (painting, changing hardware and accessories) to a full-on renovation.

Bathroom Remodel

The demolition and installation phases require a combination of precision, safety and planning. It’s also the phase when costs begin to rise. Contact San Jose Adu Builder & Room Addition for professional help.

When remodeling a bathroom, the layout is one of the first things to consider. It affects both aesthetics and function, so be sure to draw up a plan before you begin. This can help prevent costly mistakes that result in shoddy work and frustration.

Ideally, your bathroom should be able to accommodate both a tub and shower and provide ample room for storage. However, sometimes space is limited. In this scenario, you can still make room for a tub by providing a walled-in private area. This layout uses partition walls and a pocket door to reclaim space used by a conventional swinging door. This allows a larger bathtub to fit into the bathroom while also creating an alcove for the toilet.

Before starting your remodel, draft a list of both “must-have” and “nice-to-have” features to help you determine what’s best for your space. This will help you create a budget that reflects the scope of your project and inform your overall design.

While a new vanity, tub, and floor-to-ceiling cabinet can be overwhelming to plan for, this bathroom layout makes it look easy thanks to smart spacing of basic elements. The long vanity makes a double sink possible, while the large shower provides space for a soaking tub. The use of a pocket door reclaims space used by a conventional door’s swing, which is especially helpful in tight spaces.

If you are renovating your bathroom to be a forever home, consider incorporating a soaking tub that can easily be converted into a shower when your needs change. Leigh Lincoln of Pure Salt Interiors created this layout for a spa-like master bathroom that features both a shower and a tub.

Plumbing

As you make your bathroom remodel plans, a plumber can help guide you to ensure that your home’s plumbing and electrical systems are up to code. This is especially important for older homes that may have rotted vent pipes or no traps, both of which are major safety issues.

It’s also possible that you will need to install a new septic system or reroute drain lines to accommodate your new layout. This is an expensive project that should be considered carefully before you start the work.

A permit will likely be required for any structural changes, such as moving walls or changing the size of your bathroom. You will need to check with your city or county to determine the exact requirements for your area.

When completing a renovation, it’s important to have a clear plan and budget for the work that will be completed. A good rule of thumb is to allow 5-10% of your overall budget for unexpected expenses. This will help keep you from getting into a situation where you need to choose between your dream bathroom and staying within your budget.

The difference between a bathroom renovation and remodel can have significant consequences on your home’s value, so it is crucial to understand the differences before starting any projects. By understanding the difference between remodeling and renovating, you can be sure that your project is done right the first time around and avoid a costly mistake down the road. 

Electrical

Electrical work isn’t usually a DIY task, and when it comes to your bathroom, it’s best left to professionals. This includes everything from changing the location of outlets to installing new lighting and exhaust systems. This is also the time to rewire your bathroom and upgrade any outdated wiring that may not meet today’s safety standards.

A rewire can save you money in the long run, as it makes future remodeling much easier. For example, if you want to add a recessed lighting fixture in the future, it’s much easier to do that when cabling is already ran to its destination.

Any changes to your bathroom’s layout will require a permit, including changing the position of fixtures or making any other structural changes. Converting a tub into a shower, moving or adding a toilet or vanity, or increasing storage are all examples of layout changes. Similarly, replacing a shower curtain with a glass door, removing a mirror, or a adding a window are all style changes.

Installing new lighting can help bring your design plans to life, but it’s important to follow proper electrical safety guidelines. You’ll need a dedicated circuit for lights and fans (or at least a shared circuit with an appropriately rated switch) and GFCIs for wet areas.

Make sure your rewire includes adding extra outlets for things like hair dryers and electric toothbrushes, as well as providing the capacity for any future upgrades you might desire, such as heated mirrors or towel racks. A professional will be able to ensure you’re following all proper safety guidelines and avoiding potential hazards. In addition, they’ll be able to help you navigate permitting processes and determine whether or not your existing electrical panel can handle any additional load from your remodel.

Finishes

The installation phase is where the bathroom remodel transitions from paper to reality, and where the design plans come to life. It’s a time of craftsmanship and precision, ensuring that all elements fit together seamlessly.

It’s also when homeowners are able to truly customize the space with their preferred finishes. Choosing materials that are easy to maintain will save you time and money in the long run, as they’ll be less prone to staining or water damage. For example, opting for solid surface counters over laminate will help you avoid unsightly chipping and scratching.

Faucets are another opportunity to add a pop of color or personality to the bathroom. Polished chrome is classic and versatile, while brushed nickel offers a more subdued look that hides fingerprints and water spots more effectively. Matte black has gained popularity as a modern alternative to chrome, offering a bold statement that creates drama and depth to bathrooms large and small.

Shower walls are another essential component of a well-functioning and stylish bathroom. While practical walls must be waterproof, showers are an opportunity to bring a touch of luxury with natural-looking materials like marble and travertine. While these options are more expensive than synthetic and porcelain, they can offer unmatched style and beauty.

Once the finishing touches have been installed, it’s important to give the space a thorough inspection. It’s at this point that small leaks and other problems can be addressed, so it’s crucial to catch them early before they get out of hand. This is also a great opportunity to make any final adjustments to ensure that all fixtures are working properly and that they align with the design plan.

Storage

Whether you’re going for a modern look or favor traditional design, there are plenty of storage solutions to suit your tastes. Achieving bathroom organization that looks both stylish and uncluttered is all about finding the right balance of storage and decorative elements. From repurposed furniture to hidden shelving, these savvy bathroom storage ideas will help you add space and stay organized.

One of the best ways to make a statement in your bathroom is to add a pleated fabric skirt around your sink, as this gorgeous powder room from AP Design House does. The textured fabric introduces softer dimension, color, and pattern while also concealing eyesores like stacked storage containers. You could also try a narrow shelf over your sink as an alternative to a cabinet, which can be a cost-effective way to keep things like skincare products and cotton swabs organized. Look for shelves with pretty packaging for added appeal, or repurpose an old Mason jar as a vanity organizer (like this DIY project from The DIY Playbook).

It’s easy for drawers to become a graveyard for expired beauty products and miscellaneous supplies, but these handy dividers from A Fresh Nest are a great way to organize and see your essentials at a glance. You could also install a shallow closet into your wall to save on floor space and create an extra spot for towels, linens, and toiletries.

When floor space is limited, it’s important to think up, not out. Installing open shelving above your existing fixtures is a smart way to use vertical space and free up cabinet or counter space. Look for a wide variety of styles/sizes/price points, from streamlined options that blend into the wall to ones with doors that double as extra towel storage.

The Flavor of Barbecue

The smoky flavor of barbecue is hard to define. But one thing is for sure: it tastes great!

Whether smoking brisket, frying up jerky, or making a simple vinaigrette with a dash of BBQ sauce, adding smokey flavors cultivates a depth of taste. A well-made Mesa BBQ should have large side trays and a self-centering drip tray to catch the fat.

The origins of BBQ are a bit of a mystery, but it is likely that it was invented by people who were cooking spit-roasted meat over fire. In colonial America, the term barbacoa referred to a wooden structure that was used to keep animals roasted over a low fire for long periods of time. It is also possible that African Americans brought traditional cooking methods from West Africa to the US, where they would be used with local meats and indigenous ingredients.

Origins

When the American barbecue tradition was established, it became a staple of Southern cuisine. It was at this point that the popularity of BBQ exploded across the country and developed into its own unique style, reflecting regional ingredients and cultural influences. The popularity of barbecuing continued to rise throughout the 20th century, fueled by the invention of gas and electric grills, new types of sauces, and TV shows such as The Grill Dads and BBQ Pitmasters.

Today, the word barbecue is used to describe all sorts of meat cooked in an outdoor grill or over a low fire, whether it is ribs, chicken, beef, pork, or lamb. It can also be applied to any dish that is slow-cooked using an oven or smoker. However, if you ask the average person, they will probably tell you that real barbecue is only done on an open flame.

There is also confusion over the difference between barbecue and grilling. Some people argue that the difference is in the cooking method, while others argue that it is simply in the way the food is prepared. In the end, it really does not matter how the meat is cooked, as long as it is tasty.

In the early 1800s, the first charcoal briquette was invented, making it easier to cook meat over an open flame. This helped to further popularize the process of barbecuing, and in the 1930s, the first commercial barbecue sauce was created. During this time, the first gas and electric grills were introduced, making it even easier to cook meat over an open flame.

Types

There are many variations of barbecue around the world. For example, in Australia it is known as a barbie, and common dishes include steak, sausages and chicken. The meats are often marinated in a range of sauces and served with a selection of vegetables and salads. Some restaurants specialize in barbeque, especially those with a southern American theme. Others focus on Asian cuisine, such as Mongolian barbecue, which combines stir-frying and barbequing.

The main ingredients in any barbecue are meat, wood smoke and a sauce. The meat used varies widely from one region to the next, but the most common is pork, including ribs and shoulder (pulled pork). In the Carolinas, there are two main styles of barbeque: Lexington and Eastern. Both use whole hogs and serve them with vinegar or pepper-based sauces. Other ingredients used for smoking the meat can include oak, mesquite or hickory, with some recipes using less traditional smoke-generating woods such as grapevine and sassafras (an ingredient in root beer).

In the United States, there are four main types of barbecue: brisket, Kansas City, Memphis and Texas. Each has its own style of cooking and signature sauces.

Many barbecue purists claim that to be called a true barbeque, the food must be cooked over direct flames in a pit or over a charcoal fire. This is very different from the traditional method of roasting and smoking over indirect heat, which has become more popular in recent years as BBQ aficionados have sought to distinguish their food from fast-food burgers and hot dogs.

In the UK, a barbecue is a cookout where foods such as hamburgers, hot dogs and shish-kabobs are grilled or smoked over an open fire. It is commonly accompanied by a variety of side dishes and drinks such as coke, lemonade and beer. A barbecue also may feature desserts such as pies and cakes. For those with more modern barbecues, the controls are usually located on a fascia panel and are easy to reach and operate, making them suitable for users of all ages. Some even have a piezo or electronic ignition, which generates a spark to ignite the gas, and some are compatible with apps that allow users to monitor temperatures, fuel levels and cooking times.

Sauces

For home cooks, a great barbecue sauce is an essential tool in the kitchen. From a simple sweet and tangy recipe to a spicy and smoky option, there are many different ways to prepare this condiment. It can be brushed on meat before grilling, used as a marinade, or simply used for dipping. There are also a wide variety of flavors to choose from, depending on regional preferences and personal taste.

Sweet Baby Ray’s is a favorite among barbecue sauce fanatics for its classic flavor profile that’s both sweet and tangy with just a hint of heat. This sauce pairs well with a variety of grilled meats and would make an excellent choice for a pulled pork sandwich. Stubbs is another great barbecue sauce option for fans of smoky flavors, with its distinct smokiness and touch of spice. It pairs well with ribs and other smoked meats, as well as burgers and other grilled foods.

Other sauces, such as bourbon or apple cider vinegar-based versions, can be added to traditional barbecue recipes for additional flavor. Other ingredients that are often included in these recipes include Worcestershire sauce, garlic powder, onion powder, paprika, and cayenne pepper. Whether the sauce is intended for dipping, basting, or drizzling, it’s important to find one that is both thick and flavorful. Sauces that are too thin and bland usually fall flat.

The thickness of barbecue sauce can be adjusted according to personal preference, as can the amount of sugar and other sweeteners that are included in a recipe. Typically, a BBQ sauce has a base of tomato sauce or ketchup, vinegar, and sweeteners such as honey or molasses. Other ingredients include dry spices such as paprika and chili powder, and fresh or dried herbs, such as garlic and onion powder.

Homemade barbecue sauce is easy to prepare and can be made with a variety of ingredients and flavor profiles. The ingredients can be combined in a saucepan and brought to a simmer over medium heat, stirring frequently. Once the sauce is a consistency that’s to your liking, it can be stored in an airtight container for up to three months in the refrigerator or freezer.

Restaurants

If you love barbecue, chances are there’s a restaurant in your area that serves it. These restaurants usually serve a variety of dishes like ribs, pulled pork, and brisket. They also offer sides such as coleslaw, cornbread, and baked beans. Many of these restaurants offer food delivery services.

Barbecue is popular for lunch and dinner because the slow cooking process produces hearty meals that are perfect for a midday or evening meal. In addition, these meals are typically served with a variety of sauces, which adds to the flavor and appeal of the dish.

The majority of barbecue restaurants feature rustic decor and wood elements that give the eatery a unique and inviting atmosphere. Many of these restaurants also have outdoor seating that allows customers to enjoy the fresh air and beautiful scenery. Additionally, these restaurants often have open kitchen designs so that they can showcase their smoked and grilled meats to customers.

Unlike other types of restaurants, barbecue restaurants tend to have more casual atmospheres and service styles. For example, some barbecue restaurants have self-service elements, where customers order and pay at the counter before sitting down to eat their meal. In other cases, the restaurant may serve the food buffet-style.

Many barbecue restaurants have a menu that includes vegetarian and vegan options. This makes it easier for these restaurants to cater to a wider range of customers. In addition, they can make sure that their ingredients are high-quality and fresh.

There are a number of barbecue restaurants that have gained popularity amongst the masses. These restaurants are renowned for their excellent customer service and quality food. In addition, they offer a wide selection of barbecue dishes such as ribs, pulled pork, and smoked turkey.

In New York City, there are many barbecue restaurants that have gained a following. These include Mighty Quinn’s, which has seven locations in NYC and one in Hoboken. The eatery serves what its founders describe as “Texalina style,” a fusion of traditional Texas and Carolina barbecue traditions.

Other New York City barbecue restaurants that have gained a following include Virgil’s Real BBQ and Fette Sau. Both have been praised for their brisket and pulled pork.

Cabinet Refacing – A Cost-Effective and Time-Saving Method of Renovating Your Kitchen

Sacramento Cabinet Refacing Anchor is a cost-effective and time-saving method of renovating your kitchen. It involves installing a new layer of material over existing cabinets, transforming their appearance into a more contemporary aesthetic.

Cabinet Refacing

However, refacing can limit your design options and may not address structural issues in the same way as replacing them. To learn more about the pros and cons of this renovation method, read on!

Cabinet refacing is less costly than replacing cabinets because it only replaces the doors, drawer fronts, and hardware, and keeps existing boxes intact. Material costs vary based on style and quality, with laminate and wood veneers being lower-cost options. Labor is the biggest expense, however, and can fluctuate based on local labor rates. Refacing a larger kitchen can also increase costs.

It’s important to have an open dialogue with your contractor regarding your budget to avoid hidden expenses. It’s possible to add extra features like crown molding, soft-close hinges, and under-cabinet lighting, which can all increase the price of a project.

A professional cabinet refacing company will be able to help you navigate these additional costs, so you can keep your project within your budget.

Refacing is also a more eco-friendly choice than fully replacing your cabinets, as it reduces construction waste and energy use associated with manufacturing new cabinet structures. It also extends the lifetime of your existing cabinets, diverting usable materials from landfills and protecting natural resources.

Typically, refacing can be done in less time than a complete kitchen remodel, as there’s no demolition or major construction required. This can be a major convenience for homeowners who don’t want to spend weeks or months without a functional kitchen. Cabinet refacing specialists can often finish the job in 3-5 days, with your home remaining mostly functional during the process.

The fact that your existing cabinets can be refaced, rather than replaced, can also boost resale value. Having an updated kitchen is a high priority for buyers, so your kitchen can be more appealing to potential buyers.

Whether you’re looking to refresh your kitchen’s look, or you’re hoping to sell your house, upgrading your cabinets is an affordable and effective solution. Contact Let’s Face It to see how we can help you achieve the kitchen of your dreams. Our experienced professionals will work with you to design a customized cabinet refacing solution that meets your needs and fits your budget. Call today to schedule a free consultation!

Time-Saving

Cabinet refacing takes much less time than replacing your cabinets. A complete replacement requires tearing out your old cabinets, demolition, and cleaning the area to prepare for new construction, but with refacing, the existing cabinets remain in place and the process is much faster. In addition, it is a more environmentally friendly option since it prevents usable cabinetry from going to landfills and reduces waste.

The process of cabinet refacing begins with removing the old doors and drawer fronts, leaving the cabinet boxes intact if desired. The surfaces of the cabinet boxes are cleaned and prepped to ensure a uniform smooth surface for the application of the new veneers. The new pressure-sensitive veneers, chosen during the design stage, are then applied to the cabinet boxes. The Showplace Renew team will use a high-quality material to match your existing kitchen color scheme, and the finished product will look like it was always part of your home’s original design.

One of the most attractive benefits of cabinet refacing is that you can achieve a dramatic change in your kitchen’s appearance without altering the layout of your storage space. You can also choose from a wide variety of colors, finishes, and door styles to suit your design preferences. You can even opt for wood veneers to give your kitchen a natural and classic look, or choose laminate to save money.

Laminate is a popular choice for cabinet refacing because it is durable and resistant to water damage, scratches, and other wear-and-tear. It is also easy to clean, which makes it an excellent option for busy families. Wood veneers are more expensive, but they are a great way to achieve the look of solid wood at a fraction of the cost.

Another benefit of cabinet refacing is that it can help extend the lifespan of your cabinets, adding several years to their useful life. This means you can get the most out of your investment while saving money on a major remodel in the future.

It is important to note that refacing cannot solve structural problems with your cabinets. If you have issues such as sagging or warping, it is best to consult with a professional. A skilled contractor can address minor issues with your cabinetry, but significant repairs will require full replacement.

Eco-Friendly

When choosing materials for your cabinet refacing project, look for eco-friendly options that balance style and environmental stewardship. Sustainable options like reclaimed wood and recycled metals are durable and provide an attractive aesthetic. They also minimize the waste produced by traditional kitchen remodeling. The reduced waste helps reduce landfill use, which is a significant source of greenhouse gas emissions. It also prevents contamination of soil and water and conserves natural ecosystems.

Cabinet refacing is a more eco-friendly choice than full cabinet replacement, as it uses less new material. This minimizes the energy and resources required to make and move the materials, as well as the carbon emissions produced by the manufacturing process. It’s especially important to use eco-friendly paints and finishes that are low or no VOC, as these will have minimal impact on the environment.

Reusing the existing cabinet structure greatly reduces the need for raw materials such as wood and metal, which require extensive energy and resource extraction. This is a major benefit of cabinet refacing, as it can significantly reduce the overall ecological footprint of your kitchen remodel.

Many people who choose to go green with their kitchen renovations opt for cabinet refacing because it allows them to keep the cabinets they already have, while making them look brand-new. This means that they do not have to send the old cabinets to a landfill, which saves on transportation costs and produces significantly fewer carbon emissions than a full cabinet replacement.

When you work with an eco-friendly company to perform your kitchen refacing, they will also consider the effect of their materials on the environment. They will use reclaimed and recycled materials and avoid the use of new, high-VOC coatings. This will help improve indoor air quality and reduce the risks of respiratory problems for your family.

Using eco-friendly materials for your cabinet refacing project is an excellent way to protect the planet while making your home more beautiful. The use of these materials also adds value to your home, and many prospective buyers will prefer a home that has eco-friendly features.

Easy to Maintain

Cabinet refacing is an eco-friendly option because it preserves the original cabinet boxes instead of tearing them out and generating waste. In addition, it is a quicker process than complete replacement. Moreover, the materials used for refacing are more durable than wood and can easily withstand heavy use and moisture. The best part is that they can be easily maintained with regular cleaning. However, it is recommended to hire a professional like Ideal Home Improvement a Massachusetts based company, for the job to ensure that your new cabinets are installed correctly and last longer.

Cabinet Refacing also allows you to update your kitchen without the high costs and disruptions of a full remodel. Moreover, you are not limited to one design style and can choose from a wide variety of materials including solid wood and natural wood veneers, laminates, and thermofoil. You can also choose from a wide range of colors and textures, making it easy to adapt your space to current or emerging design trends. If you are remodeling your kitchen for the first time, it is a good idea to stick with neutral colors as they can work well in most design styles.

While refacing your cabinets is a great way to give them a facelift, it is important to remember that it only addresses aesthetic issues. It does not solve underlying problems such as loose hinges, worn out or broken drawer slides, and deteriorated particle board. If your cabinets are in this state, refacing is only a band-aid solution and it may be better to replace them entirely.

Despite having top-quality materials and a solid prep plan, a poor layout will still sabotage your cabinet refacing project. Make sure that you inspect your cabinets and kitchen space before beginning the refacing process to prevent costly mistakes that can lead to delays or unnecessary damage. Moreover, it is essential to empty out your cabinets and protect appliances and floors before beginning the project to avoid any mess.

Ultimately, Cabinet Refacing is a great choice for anyone looking to renovate their kitchen but cannot afford the cost of a complete renovation. With the right design and material, refacing can create a sleek and stylish new kitchen that is both functional and aesthetically pleasing.

How to Install a Concrete Driveway

Concrete Driveway Columbus Ohio is more durable than asphalt and can withstand heavier loads. It also requires less maintenance, reducing energy use for heat and oil products.

Concrete Driveway

Proper site preparation, a high-quality concrete mix and strategically placed contraction and expansion joints ensure a long-lasting concrete driveway. Select a licensed and experienced contractor to ensure a smooth project.

The first step in the installation of a concrete driveway is to clear and prepare the site. This includes removing any obstacles or debris from the area, shaping the land to fit your design, and grading the soil to a level and stable surface. Experienced site preparation contractors have the tools and expertise to handle this work efficiently and effectively.

Once the site is ready, you can then begin preparing the concrete mix. It is important to settle on the dimensions of your driveway early on and stick with them as much as possible. This will directly influence how much concrete you need to order, and changing dimensions at the last minute could compromise the strength or durability of your driveway.

After the concrete mix is prepared, it can be poured onto the site. It is then leveled and a finish is applied. Concrete is a versatile material that can be stained or dyed to achieve any desired texture or color. It is important to avoid pouring concrete in extreme temperatures to prevent cracking.

You should also install any necessary drainage features as soon as possible to prevent flooding. One option is to build trench drains, which will direct water away from the driveway and into a soakaway. Alternatively, you can use perforated drainpipes that allow water to pass through the pipes, which will keep it from building up and damaging the concrete. Finally, you should create control joints, which are a series of grooves cut into the concrete to prevent it from cracking and breaking apart as it sets. These should be spaced every 8 to 12 feet across the driveway. This will help to reduce your maintenance costs and extend the life of your concrete driveway.

Formwork

When building a concrete driveway, it is important to use formwork. This will keep the concrete in place as it is poured, ensuring that it stays in the desired shape and dimensions. It is also crucial for ensuring that the finished concrete is smooth and attractive. The formwork is typically made of wood or plywood and can be used to create a variety of different finishes for the concrete.

The formwork must be carefully constructed and anchored to ensure that it can withstand the weight of wet concrete, the pressure from the reinforcement, and any additional loads that may be applied. For this reason, it is a good idea to use a professional contractor for the job. During the hiring process, it is important to ask for references and written quotes, as well as check whether the contractor has adequate insurance coverage.

Once the formwork has been anchored, it is time to start pouring the concrete. The concrete must be poured systematically, starting at one end and working towards the other. A mechanical tamper or vibrating tool should be used to compact the concrete and remove air bubbles, which will help to ensure that the finished concrete is strong and durable.

Steel mesh and rebar can be added to the concrete for extra strength, especially in areas that are prone to soil movement or heavy vehicle traffic. This will help to reduce cracking and increase the lifespan of the concrete. It is also a good idea to add a dropped kerb, which will enable vehicles to safely transition from the pavement/footpath into the driveway. Finally, a chemical surface retarder can be sprayed on to slow the curing process and allow for easier removal of the formwork.

Pouring

Pouring a concrete driveway is a substantial project, and hiring professionals is recommended. They have the skills, tools, and experience to ensure precise grading, formwork preparation, and concrete pouring that results in a solid, long-lasting slab. They can also help with securing permits and complying with local building codes.

Once the forms have been removed and the concrete has set, it must be flattened to create a smooth surface that will hold up to traffic and weather. To do this, spread concrete evenly using a wheelbarrow or concrete pump and then use a screed board to level the surface. Finally, use hand or bull trowels to smooth the concrete and remove air bubbles.

Depending on the soil conditions, the structural demands of your home, and climate variations, you may need to add a layer of gravel or crushed stone as a base beneath your concrete driveway. This will improve drainage and prevent the concrete from shifting or cracking over time.

While it’s possible to do a concrete driveway yourself, working with professional contractors is the safest option. Be sure to research local contractors and read reviews before settling on one. Look for contractors with experience in concrete work and a track record of satisfied clients.

Adding steel mesh to the concrete during the pour process can make it fundamentally stronger and more durable, allowing your new driveway to withstand even heavy vehicle loads. This step is optional, but it’s well worth considering if you plan on storing or parking large vehicles in your driveway. It’s easy to install these reinforcing rods into the concrete during the mixing process, and they will not degrade or become exposed over time.

Flattening

Concrete needs to be flattened to create a level surface. This can be done with a straight timber 2×4. Begin at one end of the concrete slab and slowly move it across the driveway in a sawing motion, smoothing the surface as you go. If your driveway abuts an existing concrete sidewalk or slab, install isolation-joint strips to prevent damage during construction.

This process is essential to ensure that your concrete driveway is strong, durable and looks great. A skilled concrete technician can even the surface of your driveway, ensuring that there are no dips or hollows. They can also advise on the best concrete mix to use, avoiding the need for planning permission when possible.

Once the concrete has set, it can be finished to suit your style. It can be brushed for a coarse texture or smoothed with a hand trowel to achieve a fine finish. Stencils can also be used to imprint your personal design, such as a monogram or other motif.

For a more sophisticated finishing touch, concrete can be stained or tinted in a variety of colours. This can add a unique look to your driveway and can help it stand out from the crowd.

A good alternative to a traditional gravel driveway is a concrete driveway paved with interlocking pavers. These provide a more decorative finish and can be made to look like stone, slate or brick. They are also much more cost effective than a solid concrete driveway.

While gravel is cheap and easy to lay, it can become dislodged and erode over time. It can also be very slippery in winter, unless it is topped with sand or another material to increase traction. Concrete on the other hand, is very durable and requires little maintenance. If you choose a high quality concrete mix, it can last for more than 20 years and will not be affected by the elements.

Reinforcing

Concrete is a durable material that can withstand heavy loads, so it’s an ideal choice for people who need to park multiple vehicles at once or haul large trailers. However, even with standard concrete mixes, a driveway can become damaged by factors like ground movement and temperature fluctuations. Reinforcement helps to mitigate these issues by making the concrete stronger and less prone to damage.

When selecting a contractor for your concrete project, it’s important to take the time to find a reputable provider. Checking references, looking up client testimonials online, and reading reviews can help you narrow down the field. Once you’ve found a few potential contractors, shop around for prices and services to get the best deal.

In addition to ensuring the base is properly prepared, it’s also important to include an element of drainage in the concrete mix. A properly graded slope, directing water away from the concrete, can help prevent standing water that may damage or stain the surface. Using a permeable concrete mix can further boost drainage and reduce the risk of flooding and standing water.

Another way to increase the strength of your concrete is to add steel reinforcement. Wire mesh or rebar can be used to improve the durability of your concrete driveway by helping to distribute the weight of vehicles more evenly throughout the structure. Steel mesh is available in a variety of sizes and gauges, so you can choose the right option for your specific project. If you use rebar, make sure that it’s placed within the formwork and securely anchored so that it won’t shift when the concrete is poured. It’s also a good idea to place chairs in the rebar grid to keep it elevated, which will ensure that it’s fully encapsulated by the concrete when it hardens.

How Roofers Perform Roofing Installation

Your roofers will lay an ice and water barrier or leak barrier (if it isn’t already there). Next, they’ll run underlayment over the leak barrier and drip edge for added protection.

Roofing

The roofing process can be noisy, so you may want to relocate sensitive pets or children during the work hours. Open communication with your contractor is key to keeping everyone happy and safe throughout the project. Visit https://www.jmelitecontractors.com to learn more.

There are many different roofing materials on the market. Homeowners will often choose their roofing material based on cost, durability against harsh weather conditions and aesthetic appeal that matches local architectural styles.

Asphalt shingles are the most common roofing material in modern homes. They are composed of a fiberglass base coated in asphalt and embedded with mineral granules. They are easy to install and available in a variety of colors and thicknesses to suit many architectural designs.

Metal roofing is another option for homeowners. This type of roof can last for a long time, but it is not suitable for every home. It can be noisy during storms, and the panels can weigh down the structure of the building if they are not properly supported.

Concrete is a durable roofing material that can mimic the appearance of shingle and tile roofs. It is also affordable and has a decent life expectancy of 50 years or more. However, concrete is heavy and may require extra support if the roof is on a high-rise building.

Slate is a popular roofing material used on luxury homes and historical buildings. It is formed by forming clay into specific shapes and firing them at high temperatures. Slate is a beautiful roofing material that can add a touch of class to your home, but it can be expensive. Slate is also difficult to work with and requires a specialist to install.

Other roofing options include membrane and rolled roofing. Membrane roofs are made from rubber or plastic and offer excellent waterproof protection. They are usually more affordable than shingle or tile roofs, but they do not provide as much insulation. Rolled roofing is a more durable option that offers better insulation and lasts longer than membrane roofs.

The next layer of the roof is called the underlayment. This is a specialized material that protects vulnerable areas of the roof from water infiltration and ice damage. It is typically installed in roof valleys, around penetrations and on low-pitched roofs. It is self-sealing and prevents leaks by creating a barrier that seals around nails. In regions above the snow line, building codes typically require two rows of ice and water shield along the roof edges to combat ice dams.

Installation Methods

Roofers use a variety of tools and techniques to install your new roof. They may start by laying underlayment. This material acts as a barrier between your roof and the shingles to prevent water penetration. It also helps protect the roof sheeting from the elements and adds fire resistance. Roofers lay the underlayment in courses, with each layer overlapping the one before it. They then fasten the underlayment with cap nails above the drip edge.

After the underlayment is in place, your roofer can begin laying the shingle courses. They may start with starter shingles, which are half as wide as regular shingles and help the first rows line up correctly. They will then cover the starter shingles with a protective underlayment, such as felt paper or tar paper. The underlayment also helps prevent leaks by covering the bare wood of the roof deck.

Next, your contractor will install the ice and water barrier or leak barrier. This material is laid over the sheathing to protect it from moisture and ice dams. It is typically fastened to the existing drip edge for added protection.

Once the ice and water barrier is in place, your roofing contractor will install the underlayment. The underlayment will be run over the ice and water barrier and the drip edge to protect it from moisture. It will be fastened with cap nails above the drip edge for extra strength and protection.

The valleys of your roof, where the slopes meet, need special attention to prevent leakage. Your roofer will waterproof the valleys using underlayment and felt paper, with different methods that allow for the specific structure of these areas.

If you have skylights, chimneys, vents, or other structures on your roof, the roofer will install flashing to prevent leaks around these items. The flashing is a thin metal piece that covers cracks and gaps in the shingles.

If you are having a roof installed, it is important to clear the area around your house for the work. The hammering and movement on the roof can cause damage to furniture, plants, and other items on or near your home. You may want to move things like your cars, outdoor gear, or storage bins to prevent them from getting damaged during the process.

Quality Control and Inspection

Throughout the course of a roofing project, it’s important to inspect work on a regular basis. This will help ensure that any potential issues are addressed quickly and effectively, resulting in a high-quality finished product. In addition, it will allow for any necessary corrections to be made before the end of the job, preventing costly errors or delays down the road.

Inspection procedures for roofing installation are complex and detailed, often requiring extensive training. This is especially true for roofing contractors, who must find the right balance between thorough inspections and efficient production. In a fast-paced industry, striking this balance is critical to ensuring quality outcomes while maintaining profitability.

A successful roofing project depends on the quality of the materials used. Therefore, it is vital that a quality control inspector verify all materials used on a roofing project are delivered with proper documentation. Additionally, they must ensure that all materials are stored properly on site and that no damaged or obsolete materials get used in the project.

In addition to inspecting all materials, a roofing contractor should also conduct comprehensive final inspections to ensure the roof is installed per industry standards and manufacturer specifications. These final inspections will include checking that all roofing materials are securely attached to the structure, all flashing is properly installed and sealed, and that insulation and ventilation requirements have been met.

Lastly, it is important to ensure that all employees on the roofing crew are familiar with company standards and procedures. This can be done by establishing standard operating procedures (SOPs) that can be followed by all members of the roofing team. SOPs will make sure that every project is completed according to the same high level of quality, regardless of which employee is working on the jobsite.

If you’re looking for a qualified and reliable roofing inspection company, be sure to choose one that has a track record of success and is accredited by the National Roof Certification and Inspection Association (NRCIA). This accreditation ensures that your chosen inspector adheres to rigorous industry standards and has the expertise required to perform accurate and thorough roofing inspections.

Final Inspection

Once all of the construction is complete and ready for the final inspection, the roofing crew will perform a thorough cleanup of the work area. This is to ensure that all the nails are retrieved, and that the roof has been cleaned thoroughly of any debris or left-over materials from the construction process. In addition, the roofing team will have to make sure that all of the existing or new solid sheathing has been nailed properly and that no shingles are missing or damaged. They also will check that the drip edge and flashing are properly installed, which is a critical step to prevent water leaks into the structure. The inspection will include a look at the roof’s valleys, vents, and chimneys to ensure that they are sealed properly. The final inspection will also include a look at the exterior grade and wall caulking to ensure that water is properly diverted away from the building.

The final inspection is an essential part of a successful construction project. It is the last chance to address any issues, and it is the final check that will be performed before a building can be declared as completed and ready for occupancy. To help ensure a successful final inspection, contractors should understand the processes involved, and they should have systems in place to keep track of all necessary paperwork, inspections, and approvals. In addition, they should create organizational systems to keep track of all documentation and ensure that it is properly filed.

Skipping a final inspection can be incredibly costly to a construction project. Potential buyers are often wary of properties with open permits or missing inspections, and even if they aren’t, insurance companies will usually refuse to cover damage caused by uninspected work. Additionally, many lenders won’t even consider giving a mortgage for a property that doesn’t have the proper inspections.